> ## Documentation Index
> Fetch the complete documentation index at: https://wiki.lipanet.com/llms.txt
> Use this file to discover all available pages before exploring further.
# Add & Configure Mikrotik
Lipanet allows you to add & configure your Mikrotik routers without the need of contacting the customer support. This gives you freedom and efficiency as you can add a Mikrotik to your account easily.
## **How to start**
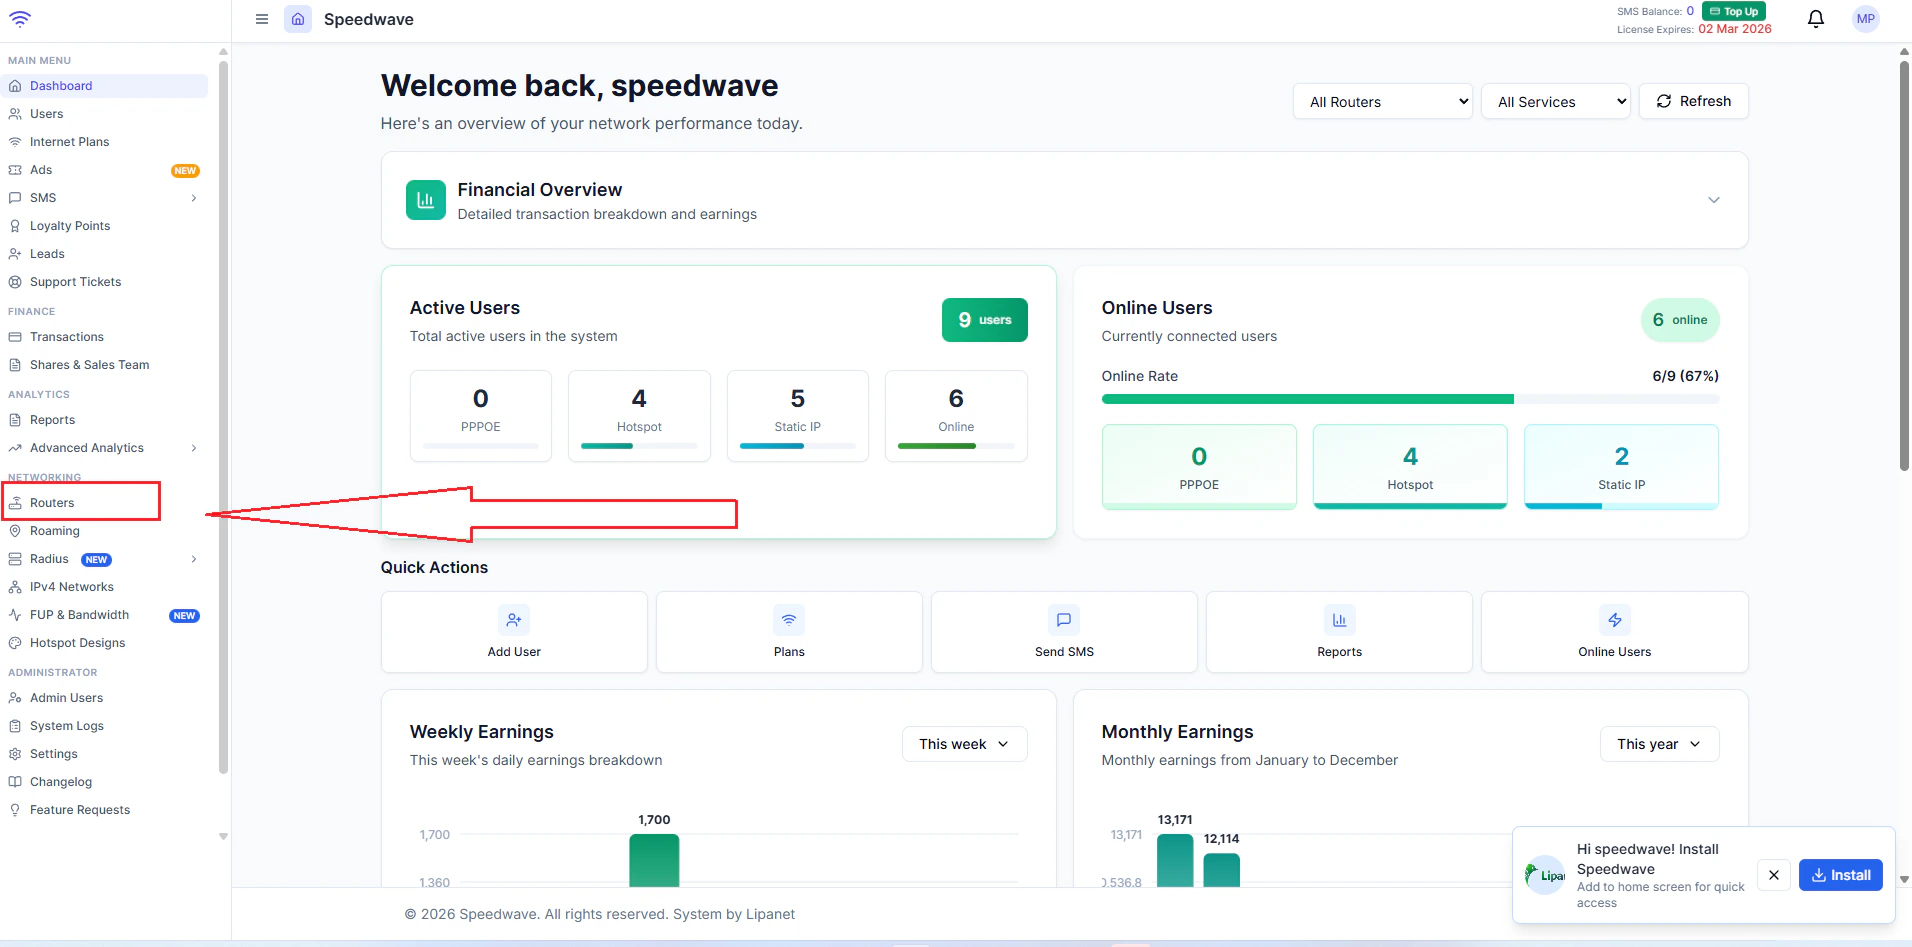
Log in to your Lipanet account and proceed to the routers section on your sidebar\\
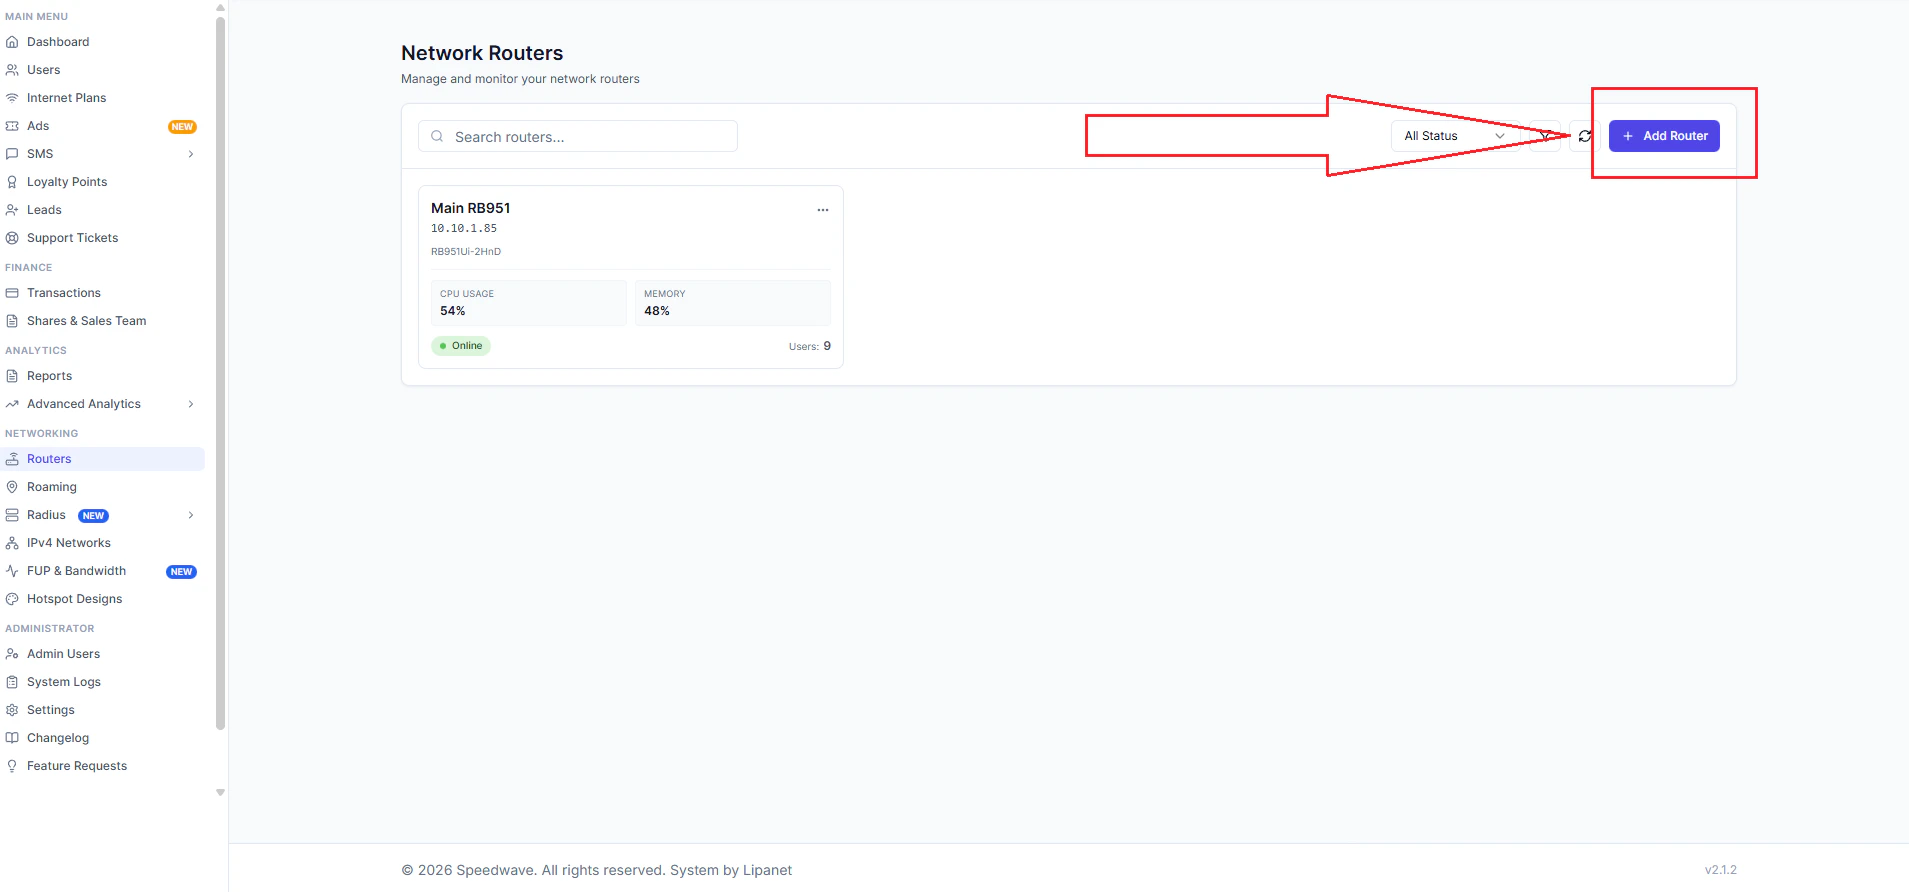
 Click add router
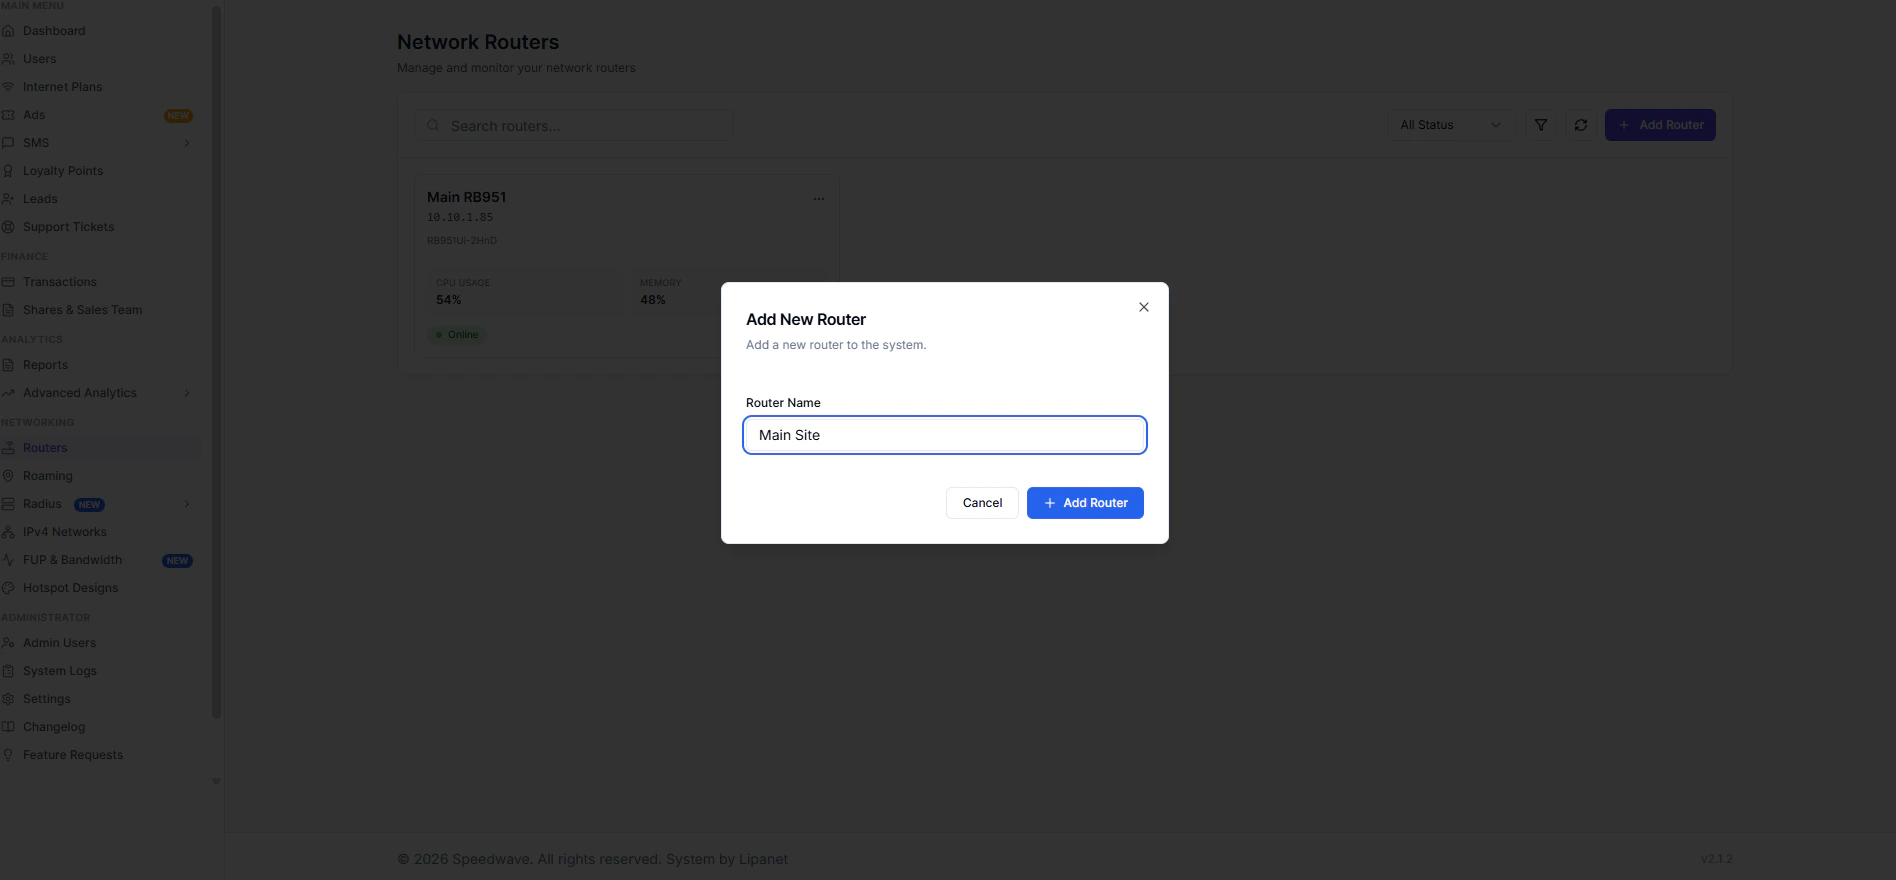
 Enter your router name, avoiding special characters like -&@!\$
 After creating your Mikrotik router, click the router to view, then proceed to the script tab.
On the script tab, you will see the main script. Copy it, open your Mikrotik terminal, and paste it.
In case you get the error "**Not allowed by device-mode.**" copy and run\
`/system/device-mode update mode=advanced`\
Then, power off your Mikrotik by disconnecting from power for 10 seconds
After creating your Mikrotik router, click the router to view, then proceed to the script tab.
On the script tab, you will see the main script. Copy it, open your Mikrotik terminal, and paste it.
In case you get the error "**Not allowed by device-mode.**" copy and run\
`/system/device-mode update mode=advanced`\
Then, power off your Mikrotik by disconnecting from power for 10 seconds
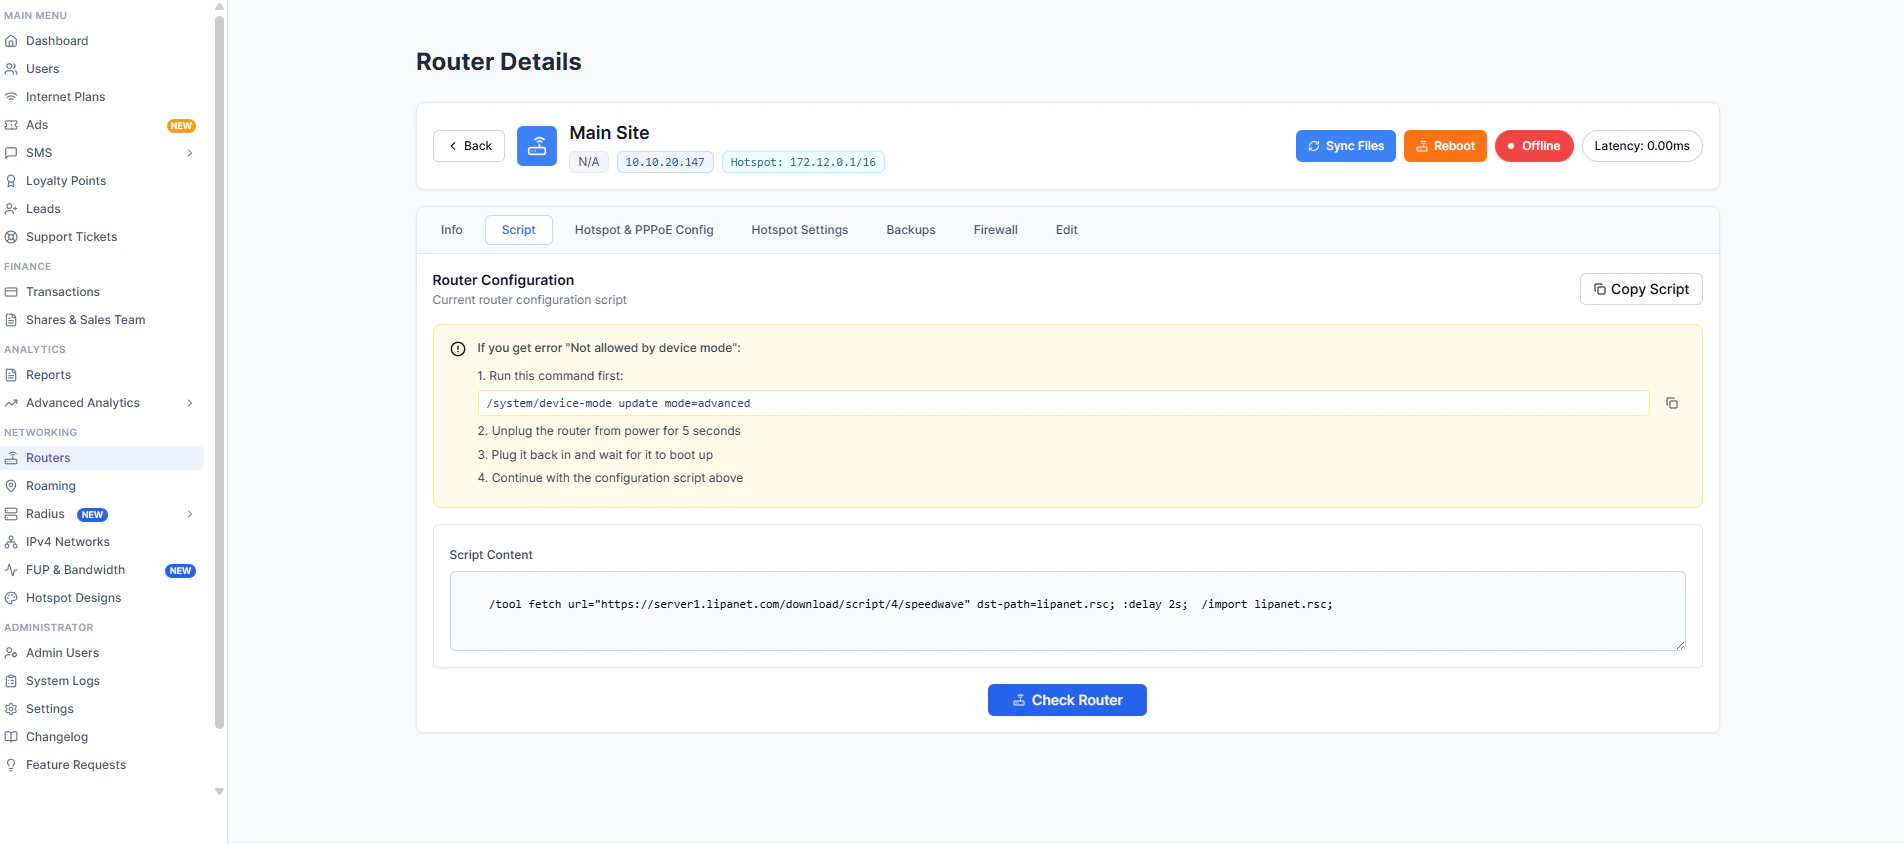 After running the script, click check router, and the router should respond successfully
### **Congratulations, you are done with the main step**
STEP 2
Now proceed to the Hotspot & PPPoE config tab\
You will see the **Check ports** button, click it to fetch the ports from Mikrotik
After running the script, click check router, and the router should respond successfully
### **Congratulations, you are done with the main step**
STEP 2
Now proceed to the Hotspot & PPPoE config tab\
You will see the **Check ports** button, click it to fetch the ports from Mikrotik
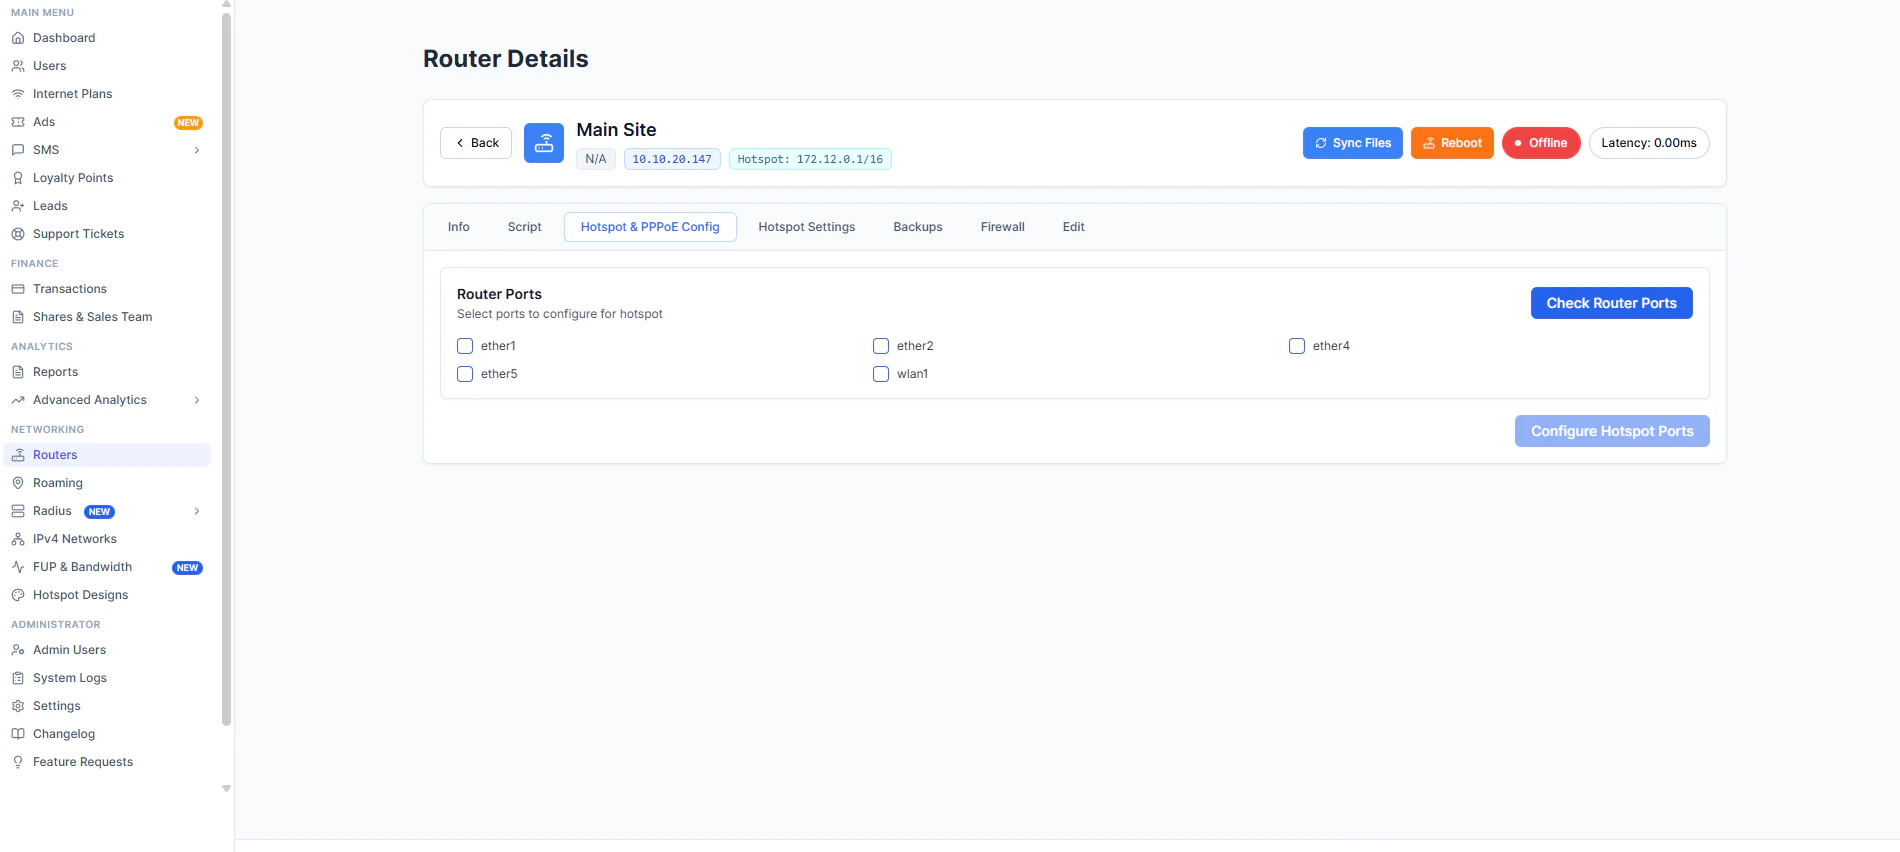 \
Select the ports you want to configure PPPoE and hotspot. **DO NOT SELECT THE WAN PORT,** as the Mikrotik won't be able to access the internet until you revert. After that, click **Configure Hotspot Ports**. This will push configurations to the Mikrotik and set the PPPoE & hotspot server on your Mikrotik.
### **FINAL STEP: SET HOTSPOT NAME & PAGE**
After completing Mikrotik setup, the last thing is to configure or set the hotspot page settings, which include the name, customer care number, free trial setting, and notification
\
Select the ports you want to configure PPPoE and hotspot. **DO NOT SELECT THE WAN PORT,** as the Mikrotik won't be able to access the internet until you revert. After that, click **Configure Hotspot Ports**. This will push configurations to the Mikrotik and set the PPPoE & hotspot server on your Mikrotik.
### **FINAL STEP: SET HOTSPOT NAME & PAGE**
After completing Mikrotik setup, the last thing is to configure or set the hotspot page settings, which include the name, customer care number, free trial setting, and notification
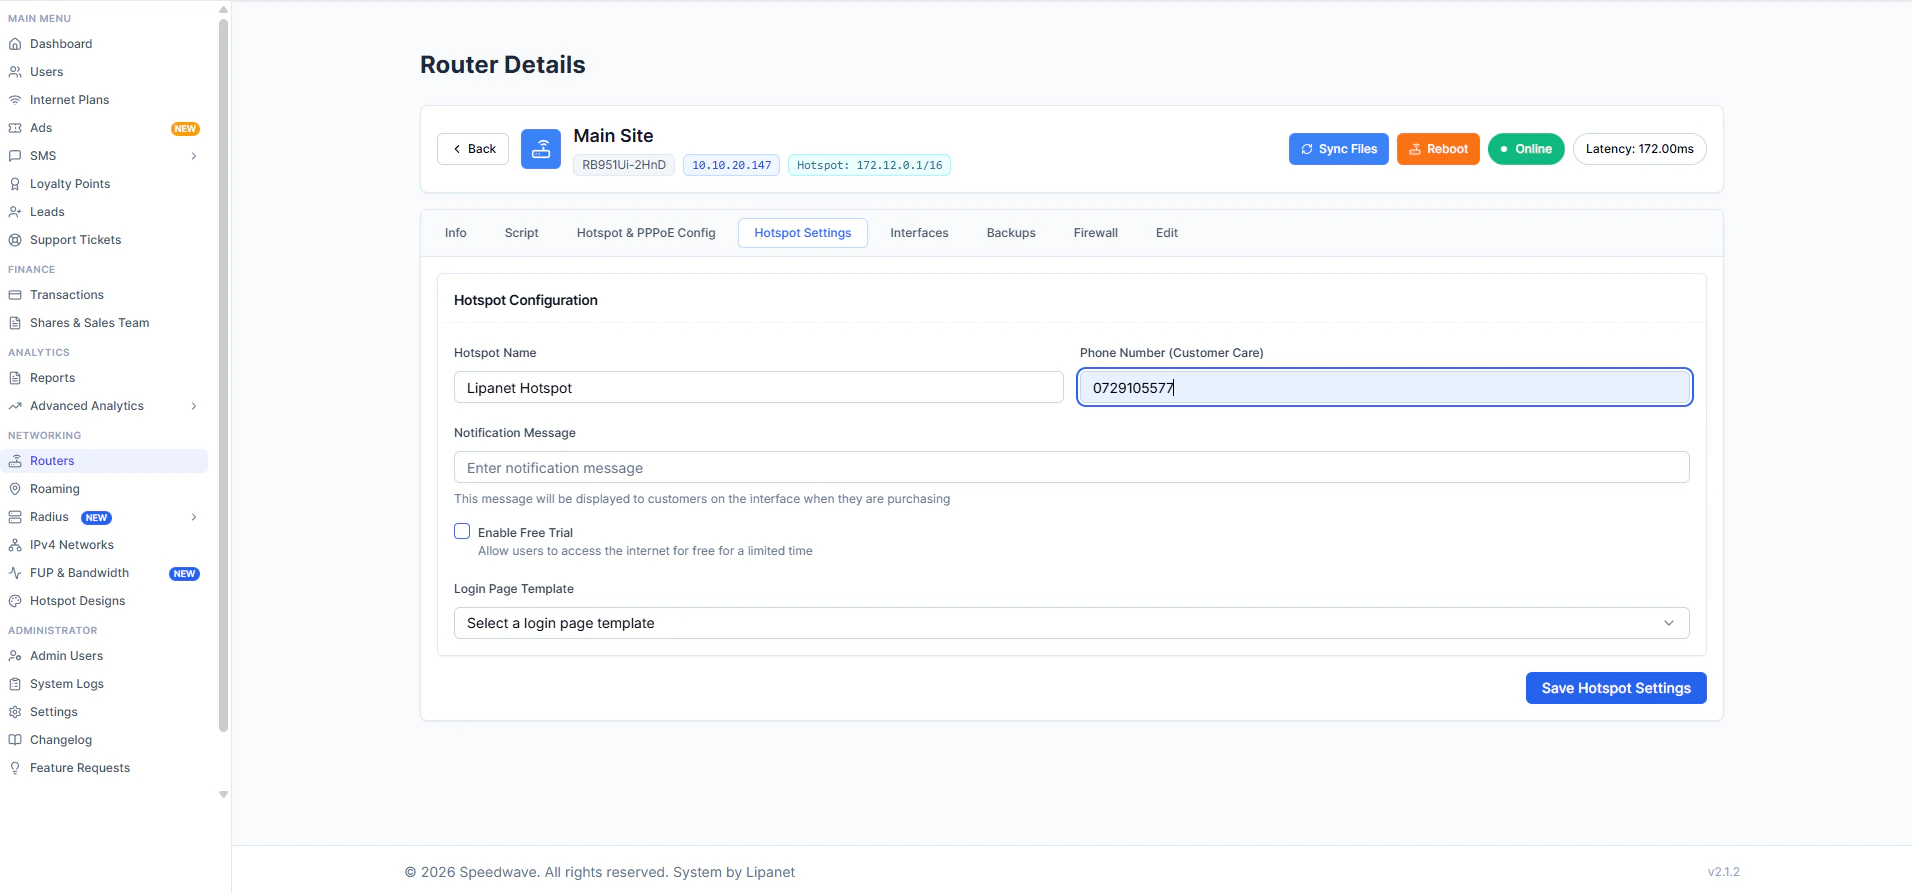 \
The notification message is the text that appears at the top of the hotspot; this can be an announcement or instructions.
We have 10 different hotspot pages. Choose the one that suits your aesthetics, then click save settings
**YOUR HOTSPOT IS NOW READY FOR USE**\
\
For customers to complete a hotspot purchase, you must set up a payment gateway. Please refer to the link below on how to set up a payment gateway
[https://wiki.lipanet.com/gateways/payment](https://wiki.lipanet.com/gateways/payment)
\
The notification message is the text that appears at the top of the hotspot; this can be an announcement or instructions.
We have 10 different hotspot pages. Choose the one that suits your aesthetics, then click save settings
**YOUR HOTSPOT IS NOW READY FOR USE**\
\
For customers to complete a hotspot purchase, you must set up a payment gateway. Please refer to the link below on how to set up a payment gateway
[https://wiki.lipanet.com/gateways/payment](https://wiki.lipanet.com/gateways/payment)